
Mexican Street Corn Salad (Esquites)
Mexican street corn salad, sometimes called esquites, is basically all the best parts of elote turned into an easy-to-scoop salad! Instead of corn on the cob, charred corn kernels get tossed with a creamy lime dressing, cotija cheese, jalapeños, cilantro, and spices for a side dish that’s smoky, tangy, creamy, and packed with flavor. I love this one, and I think you will too!

Why You’ll Love This Recipe
This one is going to steal all the attention away from your main course, and it’s proof that sides and salads don’t have to be boring. The combination of charred corn, creamy dressing, lime, and salty cotija cheese hits that perfect balance of smoky, fresh, tangy, and rich.
It’s also ridiculously versatile. Serve it with tacos, grilled chicken, steak, burgers, pulled pork, fajitas, or BBQ ribs and it fits right in every single time.
If you need something reliable for potlucks, cookouts, backyard BBQs, taco nights, or game days, this recipe absolutely delivers then too. It can be made ahead, served chilled or slightly warm, and always disappears fast.

What You’ll Need
Note: You’ll find the printable recipe card at the bottom of this post!
- Frozen corn – The shortcut that makes this easy! Once it gets charred in a hot skillet, it tastes surprisingly close to grilled street corn.
- Olive oil – Helps the corn caramelize and get those golden, slightly crispy edges.
- Red onion – Adds crunch and a little sharpness to balance the creamy dressing.
- Jalapeños – Bring fresh heat and give the salad that classic esquites flavor. Remove the seeds if you want it milder.
- Garlic – Adds extra depth and savory flavor.
- Cilantro – Bright, fresh, and basically essential in a recipe like this.
- Green onions – Add a mild onion flavor and a little extra freshness.
- Cotija cheese – Salty, crumbly, and one of the signature ingredients that makes esquites taste like the real deal.
For the Dressing
- Sour cream – Gives the dressing its creamy, tangy base.
- Mayonnaise – Adds richness and helps coat the corn perfectly.
- Lime juice – Brightens everything up and keeps the salad from feeling heavy.
- Salt & black pepper – Simple seasonings that pull everything together.
- Chili powder – Adds a little smoky warmth and that classic street corn flavor.
- Ground cumin – Just a small amount adds extra depth and savory flavor.

How To Make Mexican Street Corn Salad
- Heat a large skillet over high heat, add the oil, and cook the corn until it’s browned and lightly charred in spots. Don’t rush this step! That little bit of caramelization is what gives esquites so much flavor. Transfer the corn to a large bowl and let it cool for a few minutes.

- In a separate bowl, whisk together the sour cream, mayo, lime juice, salt, pepper, chili powder, and cumin until smooth and creamy. Give it a taste and adjust the seasoning if needed.

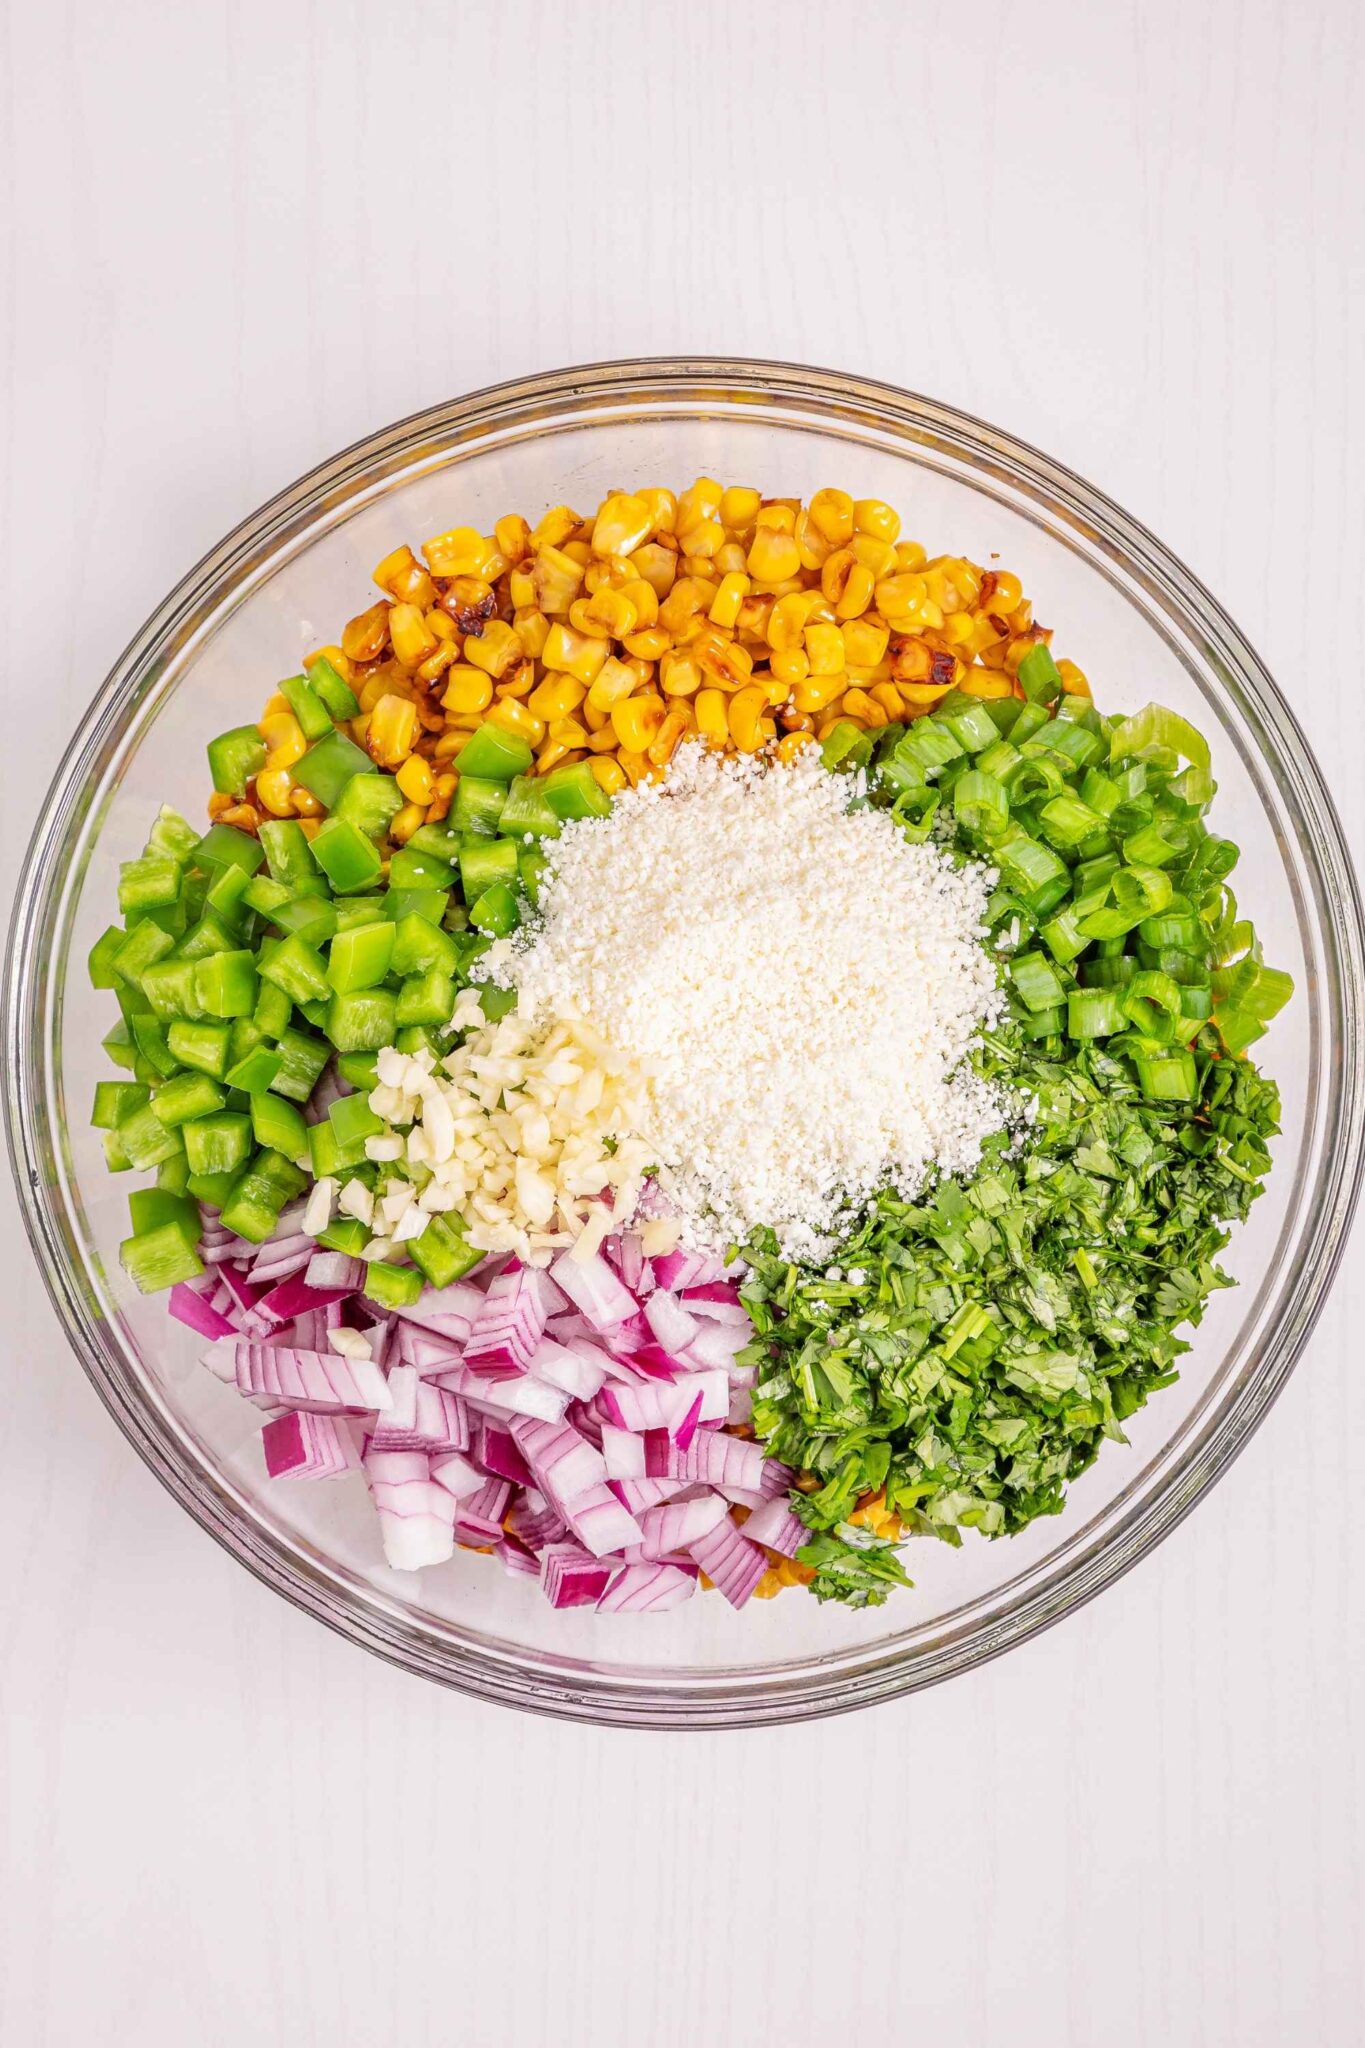
- Add the red onion, jalapeños, garlic, cilantro, green onions, and cotija cheese to the bowl with the corn. Pour the dressing over everything and stir until well coated.
- Serve it right away or chill it in the fridge until you’re ready to eat.
Storage
Store any leftovers in an airtight container in the refrigerator for up to 3–4 days.
The flavors get even better after a little time in the fridge, so this is a great make-ahead side dish for parties, cookouts, or meal prep.
Just give it a quick stir before serving since the dressing can settle a bit as it sits. If you want to freshen it up, add an extra squeeze of lime juice right before serving!

Recipe Notes & Tips
- Frozen corn is perfect for this recipe because it chars up beautifully in a hot skillet. Fresh corn works great too, especially in summer. I’d skip canned corn here, because it tends to stay soft and doesn’t get those golden, toasty edges that make esquites so good.
- No need to thaw the frozen corn first. Straight-from-the-freezer corn actually browns better because the moisture cooks off quickly in the hot pan.
- The key to getting that street corn flavor is letting the corn really sit and caramelize. Try not to stir it constantly or you’ll miss out on those charred bits.
- Use the biggest skillet you have so the corn can spread out in an even layer. If the pan is overcrowded, the corn will steam instead of brown.
- Taste before serving and adjust as needed. Sometimes an extra squeeze of lime or pinch of salt is what makes everything pop.
Serving Ideas
This one works with almost everything! It’s especially good alongside grilled chicken, steak, tacos, burgers, BBQ ribs, or fajitas. Basically anything smoky or spicy!
It’s also perfect for parties and cookouts because it can be served warm, cold, or somewhere in between.
For taco nights, I love serving it alongside carne asada, pulled chicken, or carnitas with chips, guac, and salsa on the table. It also makes a great addition to potlucks since it travels well and doesn’t need much fuss once it’s made.
You can also pile leftovers into burrito bowls, tacos, or wraps the next day for an easy lunch situation.

Mexican Street Corn Salad (Esquites)
Ingredients
- 24 oz frozen corn
- 1 tablespoon olive oil
- ½ red onion diced
- 2 jalapenos seeded and diced
- 2-3 garlic cloves minced
- 1 bunch cilantro chopped
- ¼ cup sliced green onions
- ¼ cup cotija cheese
Dressing:
- 3 tablespoons sour cream
- 3 tablespoons mayonnaise
- 2 limes juiced
- ½ teaspoon salt
- ¼ teaspoon black pepper
- ¼ teaspoon chili powder
- ⅛ teaspoon ground cumin
Instructions
- Heat a large skillet over high heat, add the oil, and cook the corn until it’s browned and lightly charred in spots. Don’t rush this step! That little bit of caramelization is what gives esquites so much flavor. Transfer the corn to a large bowl and let it cool for a few minutes.
- In a separate bowl, whisk together the sour cream, mayo, lime juice, salt, pepper, chili powder, and cumin until smooth and creamy. Give it a taste and adjust the seasoning if needed.
- Add the red onion, jalapeños, garlic, cilantro, green onions, and cotija cheese to the bowl with the corn. Pour the dressing over everything and stir until well coated.
- Serve it right away or chill it in the fridge until you’re ready to eat.
This is the salad you’ll want to make all summer long! Got a question or a comment? Pop it below and I’ll get back to you ASAP!